---
title: 'GitHub Pages'
url: 'https://niklas-stephan.de/en/wiki/projects/how-tos/github-pages'
markdown: 'https://niklas-stephan.de/en/wiki/projects/how-tos/github-pages.md'
lang: en
date: '2026-11-14'
description: 'GitHub Pages When it comes to building simple yet modern websites, there are options that require little technical know-how. One of the easier ways to do it without completely losing a professional standard or having to rely on all-in-one external solutions is to use platforms like GitHub Pages. Th…'
---

# GitHub Pages

When it comes to building simple yet modern websites, there are options that require little technical know-how. One of the easier ways to do it without completely losing a professional standard or having to rely on all-in-one external solutions is to use platforms like GitHub Pages.

This article describes how GitHub Pages can be used by you as a simple and effective solution for building modern websites. Along the way I cover the tools and steps needed to get a website up and running quickly.

## Scenario

Our goal is to publish a website we created publicly under a GitHub-generated URL such as <https://handtrixx.github.io/githubpagesdemo/>. The result should then look like this:

![](https://niklas-stephan.de/user/pages/wiki/projects/how-tos/github-pages/00-result.webp)

## What do we need?

To create the website, you need the following tools:

1. A text editor
2. The GIT tool
3. A GitHub account
4. An HTML file

For our mini-project we will use "Visual Studio Code" as our text editor, since it is available for almost every operating system and offers a wide range of extensions, e.g. Git.

Git is a version control system that lets you track changes to the code, keep control of them, and collaborate efficiently with others. This way you can work on the website locally on your PC without the changes going live (visible to everyone) right away.

GitHub is a platform that lets you store, version and share your code. Put differently, it is a graphical interface for Git with plenty of extras, whose operation you don't have to worry about.

To create the HTML file we will start with plain HTML, for which there are tutorials all over the internet if you are interested, e.g. also here: <https://www.w3schools.com/html/default.asp>.

## Prerequisites and first steps

The instructions below vary slightly depending on your operating system and personal configuration.

### Installing Visual Studio Code and Git

You can download and install the program Visual Studio Code for free from the official website at <https://code.visualstudio.com/>.

![](https://niklas-stephan.de/user/pages/wiki/projects/how-tos/github-pages/01-download-vscode.webp)

On the first start of the program you are greeted by a wizard that you can simply close.

Instead, navigate in the left-hand panel to the third option, which stands for Git integration. There you will be prompted that you need to install Git first.

![](https://niklas-stephan.de/user/pages/wiki/projects/how-tos/github-pages/02-download-git.webp)

You confirm the subsequent dialog, which results in the Git download page opening in your browser. There you download the installation file.

![](https://niklas-stephan.de/user/pages/wiki/projects/how-tos/github-pages/03-git-hp.webp)

After downloading the installation file you start the installation by running the file. For the selection of components to install, stick with the default settings and click "Next".

![](https://niklas-stephan.de/user/pages/wiki/projects/how-tos/github-pages/04-git-editor.webp)

For the remaining steps of the installation, follow the suggested values as well and wait until the installation is complete.

So that your editor (VSCode) works optimally with Git, close it and restart it after Git has been installed.

Next up is setting up your project.

### Setting up the project directory

You open Visual Studio Code and create a new project directory on your PC's local hard drive.

![](https://niklas-stephan.de/user/pages/wiki/projects/how-tos/github-pages/05-new-project.webp)

It doesn't matter where on the hard drive you create the folder; you just need to be able to remember the location, and you should under no circumstances store other files there, because you are about to sync this folder with GitHub.

In our example you therefore create a folder "webdev" in your own files and inside it the subfolder "githubpagesdemo". It should look something like this:

![](https://niklas-stephan.de/user/pages/wiki/projects/how-tos/github-pages/06-emptyfolder.webp)

On Windows, roughly:

```bash
C:\Users\niklas\OneDrive\webdev\githubpagesdemo
```

On Linux:

```bash
/home/niklas/webdev/githubpagesdemo
```

And this exact folder is now what you open in Visual Studio Code.

![](https://niklas-stephan.de/user/pages/wiki/projects/how-tos/github-pages/07-a-trustfolder.webp)

Usually a dialog now appears asking whether you trust the author of this folder. Since you are the author yourself, you can of course confirm that without hesitation.

![](https://niklas-stephan.de/user/pages/wiki/projects/how-tos/github-pages/07-openfolder.webp)

Now that your folder is open, you can begin setting up the project.

To get started, first create just one file named `README.md`. That is common on GitHub, providing basic information about the "project" on its start page in GitHub.

To create a new file in VSCode, click the "New File" icon, use the keyboard shortcut `Ctrl+N`, or right-click in the VSCode Explorer and choose "New File".

![](https://niklas-stephan.de/user/pages/wiki/projects/how-tos/github-pages/09-newfile.webp)

Enter `README.md` as the file name and confirm the entry, then save some first text in the file.

![](https://niklas-stephan.de/user/pages/wiki/projects/how-tos/github-pages/10-readmemd.webp)

Here is the text to copy if you don't feel like typing:

```markdown
# GithubPages Demo

This is our first edit of the README.MD file for our new GitHubPages project.
```

Next up is setting up your GitHub project.

### GitHub and Git

To use Git and GitHub Pages you need a GitHub account and a repository in which you can host your website.

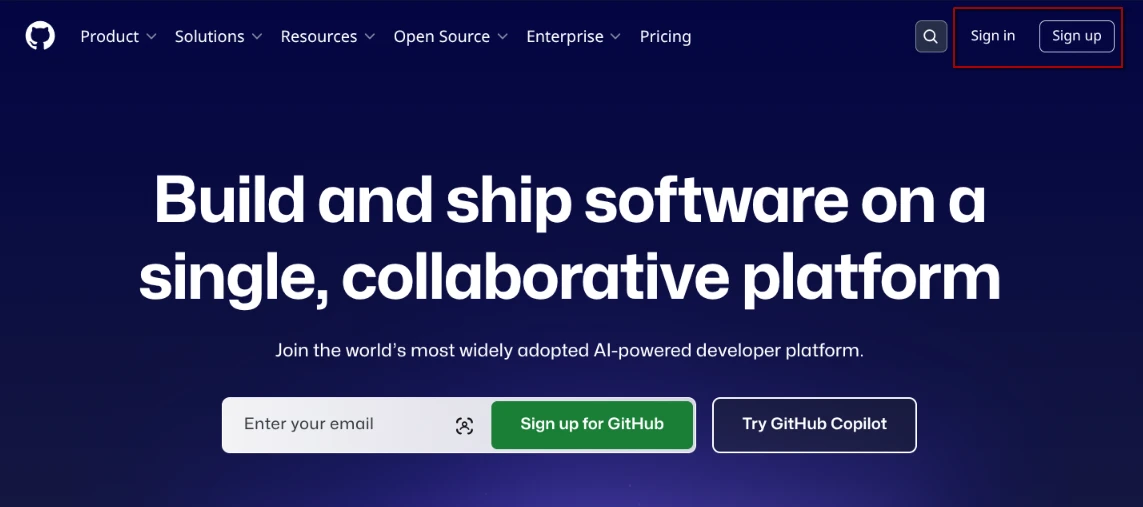
On <https://github.com> you first create a new account or sign in with an existing one.
![](https://niklas-stephan.de/user/pages/wiki/projects/how-tos/github-pages/11-github.webp)

Now you make your GitHub user known to the locally installed Git by running the commands `git config --global user.name "YourName"` and `git config --global user.email "YourEmail@example.com"`.

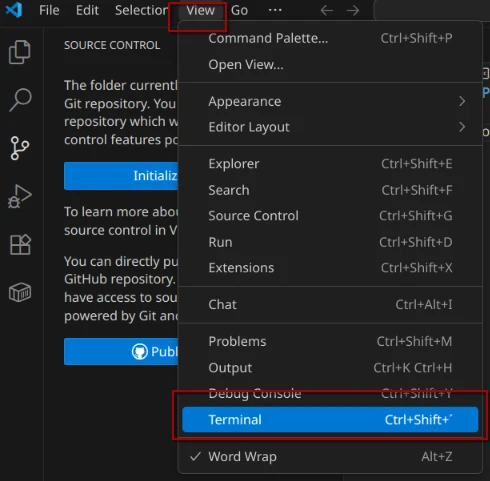
For that you need a command line, such as the Command Prompt (Windows), the Terminal (Mac) or a shell (Linux). Fortunately the command line, also called terminal, is integrated into VSCode.
![](https://niklas-stephan.de/user/pages/wiki/projects/how-tos/github-pages/11-terminal.webp)

The terminal window appears below the editor and lets you enter commands directly. Adapt the two configuration commands mentioned above by inserting your name and your email address, confirming each with the Enter key.

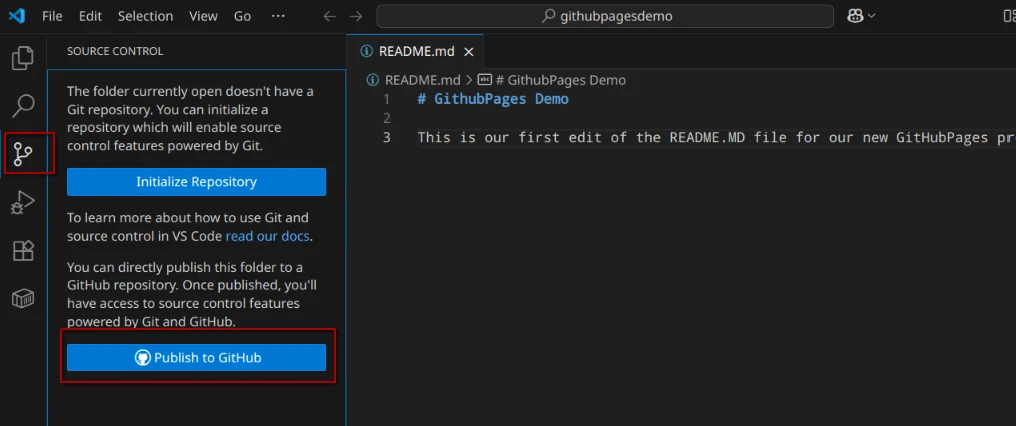
Once that is done, you can start the process of publishing your repository.
![](https://niklas-stephan.de/user/pages/wiki/projects/how-tos/github-pages/12-firstpublish.webp)

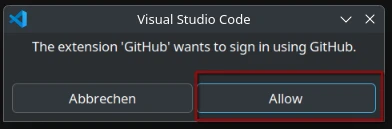
You can confirm the following prompt to allow access to your GitHub account.
![](https://niklas-stephan.de/user/pages/wiki/projects/how-tos/github-pages/13-allowaccount.webp)

Now your browser should open and show the GitHub page where you can authorise the access. Sign in here with the GitHub account you created earlier.
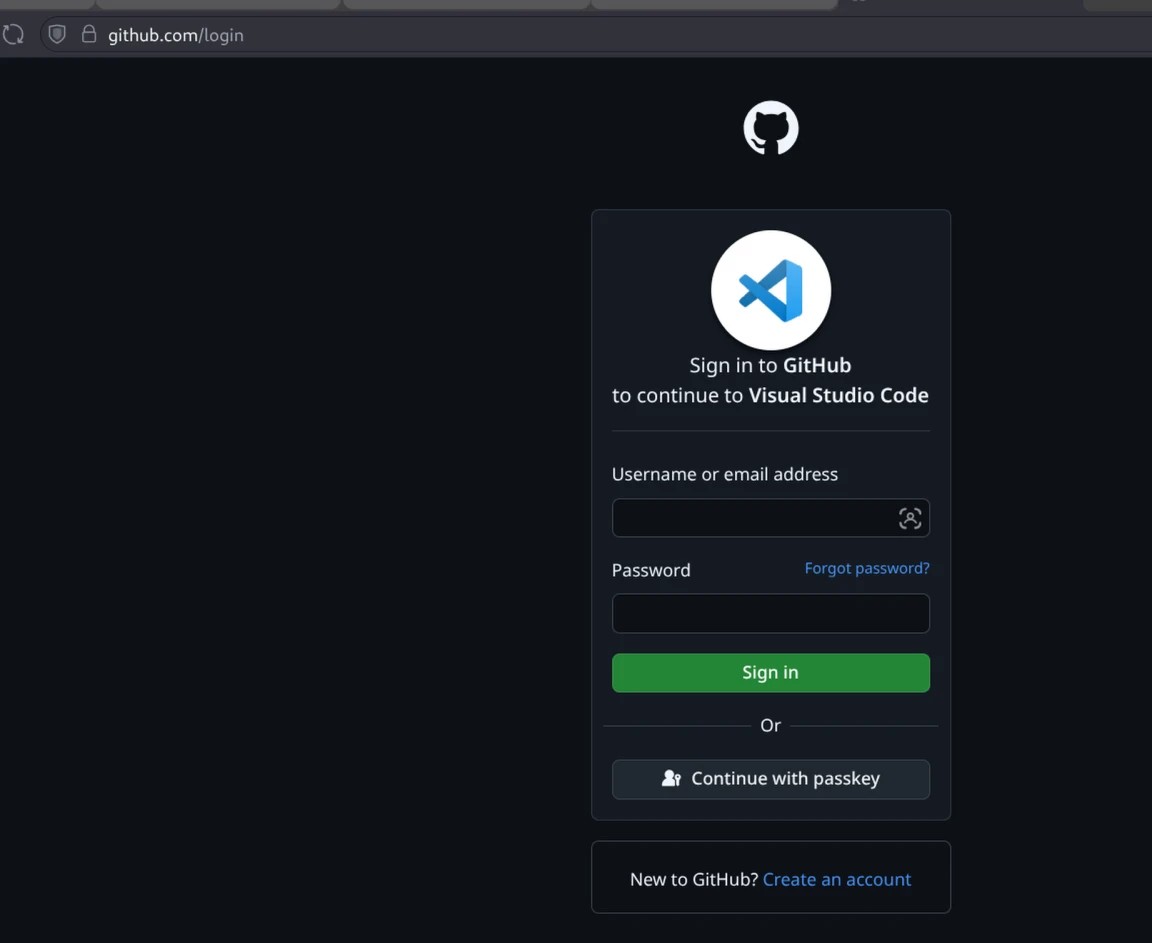
![](https://niklas-stephan.de/user/pages/wiki/projects/how-tos/github-pages/14-githubvscodelogin.webp)

Once that has happened, you should see a prompt in the upper area of the VSCode screen asking for the desired name of your repository. You can accept the suggested name or enter your own name for your repository. You also have to set the repository's visibility to public (Publish to GitHub public repository) here so that your website is accessible to everyone. Then confirm your selection to continue.
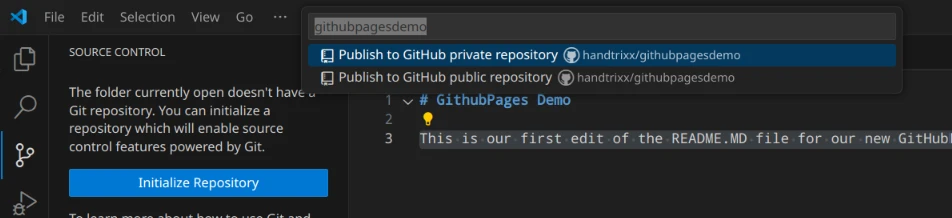
![](https://niklas-stephan.de/user/pages/wiki/projects/how-tos/github-pages/15-namerepository.webp)

Normally your repository should now have been created and published successfully. Corresponding messages in VSCode confirm this. You can now use the generated URL to open your repository in GitHub in the browser. VSCode also asks whether it should regularly check for changes in the repository, which can't hurt.
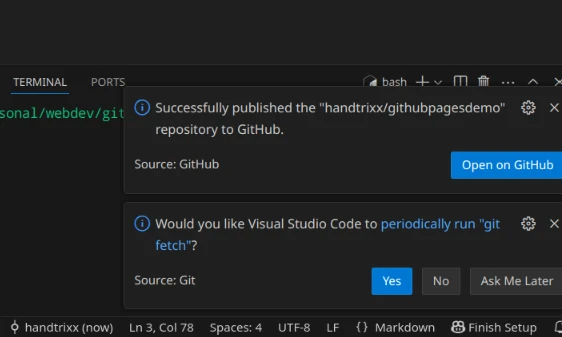
![](https://niklas-stephan.de/user/pages/wiki/projects/how-tos/github-pages/16-linkdone.webp)

If you followed the link out of curiosity, your repository on GitHub should now look like this:
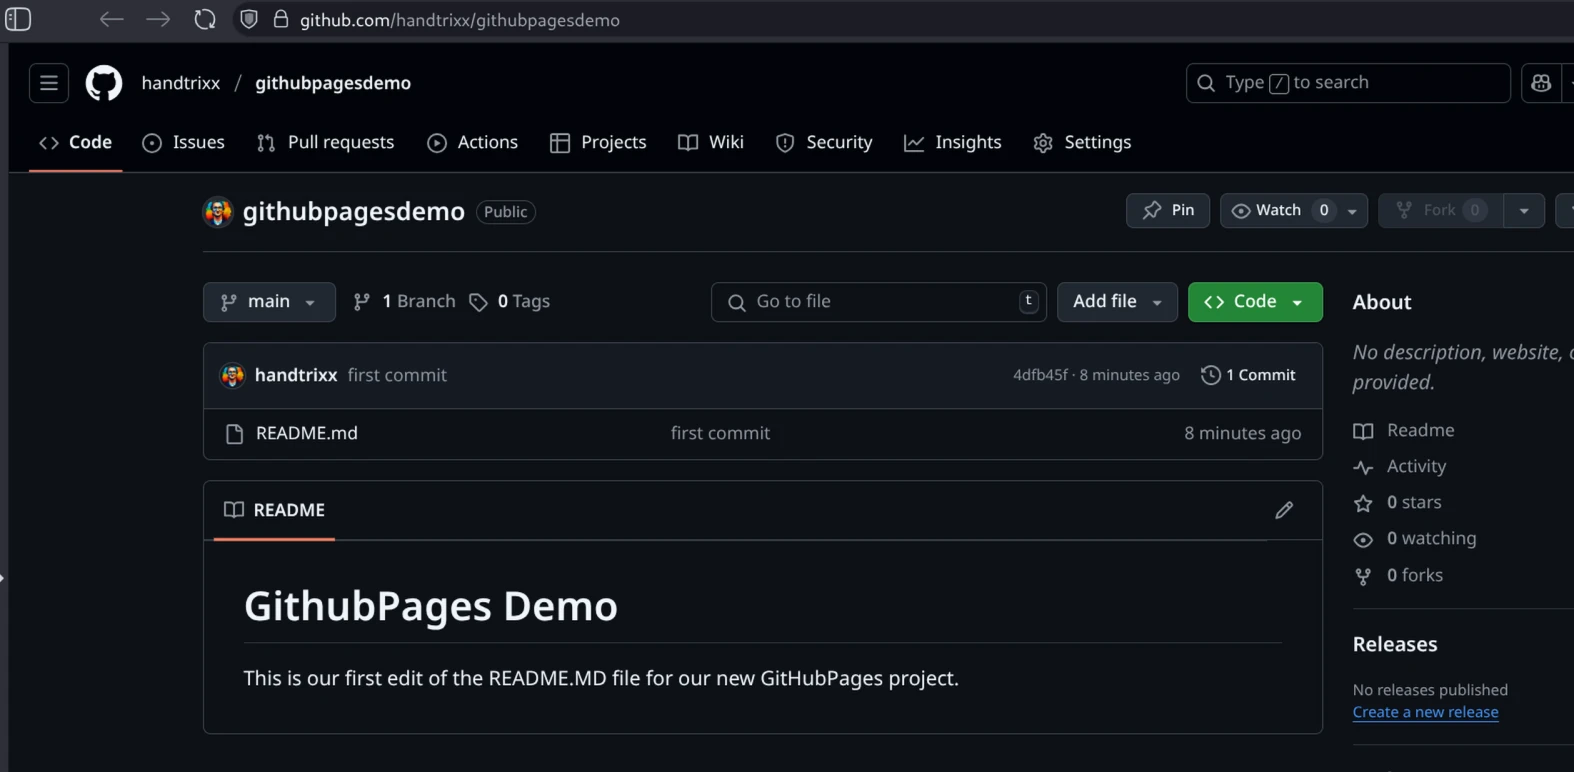
![](https://niklas-stephan.de/user/pages/wiki/projects/how-tos/github-pages/17-cleanrepository.webp)

Ok, admittedly, all of that sounds a bit technical, but don't worry – with a little practice all of this will quickly feel familiar to you. And above all: all the previous steps were one-off, i.e. editing your website is now almost "child's play".

## On to the content

So far our repository contains only a README file, which serves as a placeholder. What is still missing is the content of your future website, which we will create with an `index.html` file.

### index.html - The foundation of your website

In the next step we add an `index.html` file to create the content of our website. So create this file with the HTML content you want, or use my example code here:

```html

<html lang="de">
<head>
    <meta charset="UTF-8">
    <meta name="viewport" content="width=device-width, initial-scale=1.0">
    <title>Meine erste Website</title>
</head>
<body>
    <h1>Willkommen auf meiner Website!</h1>
    <p>Dies ist ein Beispielinhalt für deine erste GitHub Pages-Website.</p>    
    <p>Erstelle deine eigene Website mit nur wenigen Schritten und teile sie mit der Welt!</p>
</body>
</html>
```

Make sure you save the changes, which also becomes visible by the number 1 lighting up on the left side of VSCode in the 3rd icon (Git).
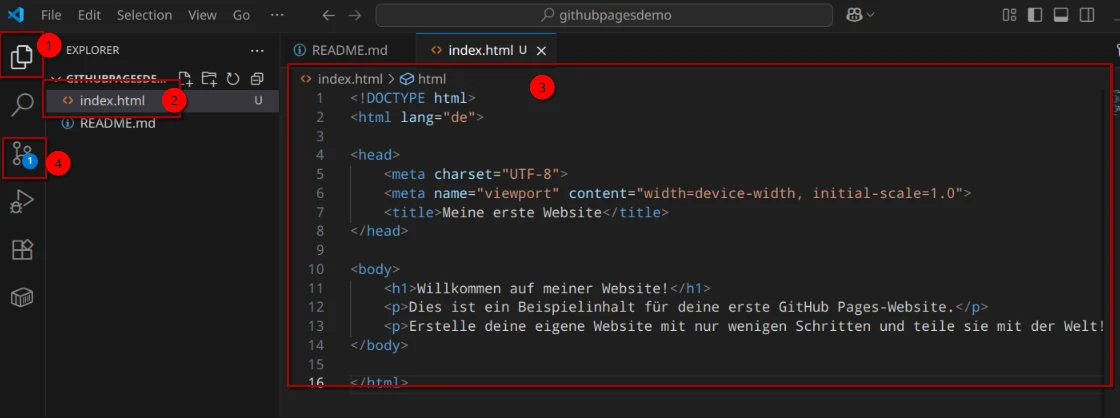
![](https://niklas-stephan.de/user/pages/wiki/projects/how-tos/github-pages/18-indexhtml.webp)

And at this point the advantage of Git really becomes clear. While you can view the index.html file you created locally in your browser (just open it via your operating system's file manager), it is not yet in your repository. That means you can make all your changes at leisure over days, and you decide yourself when you want to publish.

And to publish then, we switch to the left icon bar for Git (3rd icon) with one click. Then we enter a so-called commit message that documents our changes, e.g. "My first commit.". Then we click the "Commit" button.
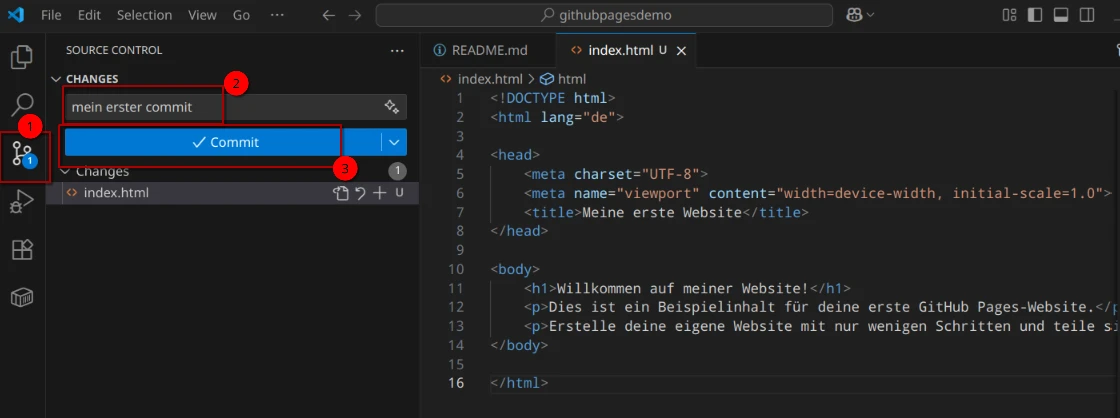
![](https://niklas-stephan.de/user/pages/wiki/projects/how-tos/github-pages/19-firstcommit.webp)

In the dialog window that appears once in the following steps, choose "always" to automate future confirmations and simplify the workflow. This saves you time and lets you focus on what matters.
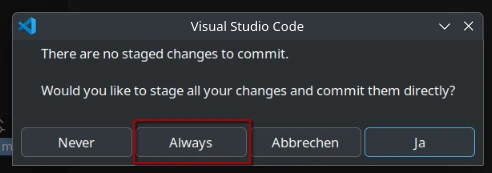
![](https://niklas-stephan.de/user/pages/wiki/projects/how-tos/github-pages/20-alwayscommit.webp)

Now our change is recorded as shared, but still not published (synced). We catch up on that by clicking the "Sync Changes" button to upload the changes to the remote repository.
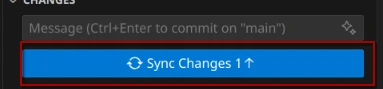
![](https://niklas-stephan.de/user/pages/wiki/projects/how-tos/github-pages/21-syncchanges.webp)

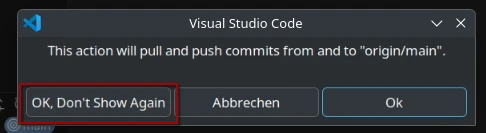
In the following dialog window choose "OK, Don't Show Again" to automate future confirmations and further simplify the workflow.
![](https://niklas-stephan.de/user/pages/wiki/projects/how-tos/github-pages/22-alwayssync.webp)

That synchronises the local state with the remote repository.

**You will repeat these last actions again and again in the future. So for every file change: save it, "commit" the change, then sync.**

## Activating GitHub Pages

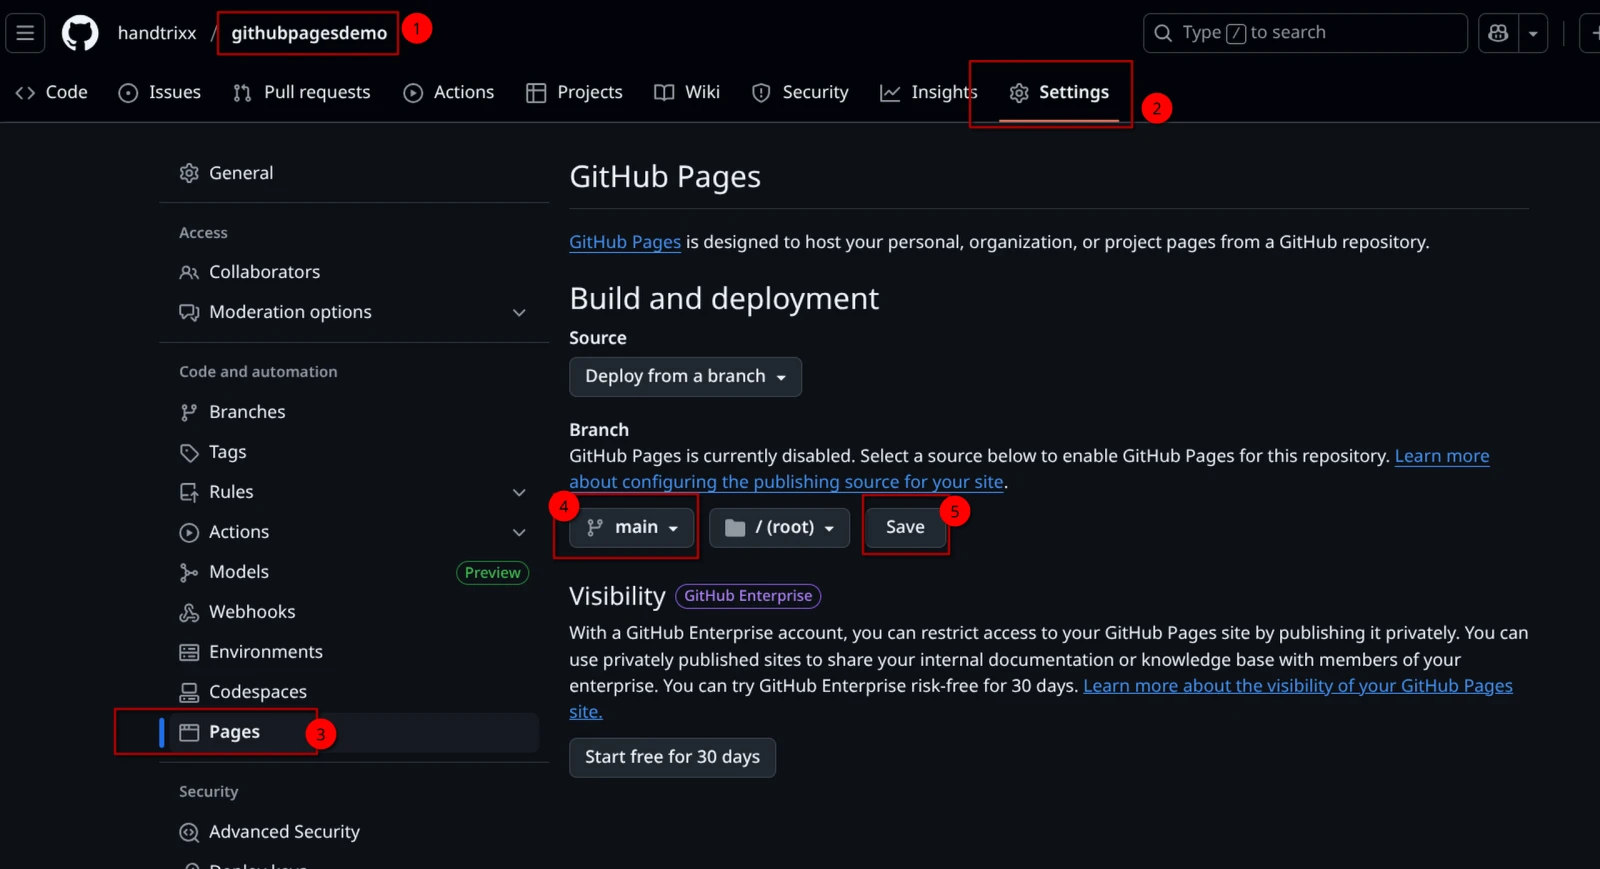
Ok, you have now created a rudimentary website and synchronised it with GitHub. The last step to turn it into a real website is activating GitHub Pages for your repository.

To activate GitHub Pages, go to your repository's settings, scroll down to "Pages" and select the branch that should serve as the source for the website ("main"). Save the settings, and your website is published.
![](https://niklas-stephan.de/user/pages/wiki/projects/how-tos/github-pages/23-githubpages.webp)

Tada! Your website is now live! You can find the link in the right-hand area of your repository's start page, or enter it manually in your browser. The pattern is always the same:

<https://YOURUSERNAME.github.io/YOURREPOSITORYNAME>

in my example, then:

<https://handtrixx.github.io/githubpagesdemo/>

## Why is all of this free? Where's the catch?

Git is an open-source versioning system written by Linus Torvalds (the "inventor of the operating system Linux") more or less out of frustration over the lack of alternatives. Open source means that anyone can inspect, use and modify the code. The business model behind it consists of consulting services and support.

The GitHub platform and its associated services now belong to the Microsoft Corporation and are only partly open source. Microsoft offers the basic services for free in order to make money with extended services for professional use.

Visual Studio Code was likewise developed by Microsoft as open-source software. It is considered a lightweight alternative to the paid Visual Studio (without "Code" at the end).

The Bootstrap framework comes from Twitter (today X), originating as a byproduct of the development of Twitter itself, and was later published as open source by the team. Similar to Google's Material Design, such popular frameworks define the design guidelines for modern web applications.

All of the ones mentioned have developed over a period of a few to many years into "quasi-standards" in web development and are used by millions of people.

The catch is that open source is free, but often requires technical knowledge and initiative in order to be used effectively.

## Conclusion

With a little patience and work you can achieve impressive results as a beginner too and build your own website professionally!

If you need help creating the HTML content, it is worth looking at the well-structured tutorials at W3Schools <https://www.w3schools.com/html/default.asp>, or using a framework like Bootstrap <https://getbootstrap.com/docs/5.3/getting-started/introduction/>.

As soon as your website contains more than the start page and also dynamic content, you should consider using a static site generator framework or a content management system (CMS) to make development easier. Check this out: <https://niklas-stephan.de/blog/perfect-website-2025/>.

For questions about the article directly, please use the comment function.

---

## Navigation

- Parent: [How-To's](https://niklas-stephan.de/en/wiki/projects/how-tos.md)
- Previous: [Abacus in VSCode](https://niklas-stephan.de/en/wiki/projects/how-tos/abacus-in-vscode.md)
