Kategorie: Mac & PC

  • Passwordless SSH Login to a Remote Server with Visual Studio Code

    Passwordless SSH Login to a Remote Server with Visual Studio Code

    Following article describes how to enable You to login to a Remote Server with the industry standard SSH network protocol by using a key and Visual Studio Code, so you do not have to enter your user/password every time you want to connect. It was written for/on MacOS, but the procedure should be the same on Linux and similar for Windows.

    Preparation

    At first download, install and open VS Code.

    Then install the „Remote – SSH“ Extension by changing to the Extensions tab, searching for it and click on „Install“.

    Fun with Keys

    At next open a terminal session by option „New Terminal“.

    At the terminal prompt (normally shown at the bottom of your window) connect to your server by entering following line and pressing enter key.

    ssh -p PORT USERNAME@SERVER

    So for example your line could be like „ssh -p 22 heinz@mydomain.com“. Then accept/confirm any dialogues you are prompted to for confirmation as well es entering the password.

    Now, just leave the ssh session by entering following command to the terminal:

    exit

    At next you create a key for ssh (in case you do not already have one) on your local PC. Be sure you really exited/disconnected from the server before:

    ssh-keygen

    Once done, you can copy the public key part to the server by utilizing following command:

    ssh-copy-id -p PORT USERNAME@SERVER

    Next time if you login to the server with ssh you will not be asked for the password anymore but the key will be automatically verified in the background.

    Setting up the environment

    So let’s try that by login at the server (ssh -p PORT USERNAME@SERVER) in the terminal again and by creating a workspace directory for the files you want to edit/control with VS code later on.

    mkdir DIRECTORYNAME

    The directory name can be anything you prefer, so e.g. „mkdir data“ could be suitable. Jump into this directory by sending command:

    cd DIRECTORYNAME

    e.g. „cd data“. Then print the full directory path to the terminal screen by:

    pwd

    The result will be something like „/home/heinz/data“. Copy this path to your clipboard or note/remember it. You are more then 50% done, now.

    Configure VS Code

    Open the Remote SSH tab in VS Code and click on „+“ at SSH in the Remote Explorer.

    Enter the same command you used before to connect to your server at the new prompt shown on top of the window:

    ssh -p PORT USERNAME@SERVER

    Choose the local ssh config file to update, normally the first propsal is fine.

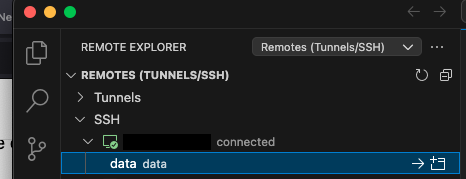
    Now, in the Remote Explorer you should see the new option for connection, like:

    If it’s not directly shown, just click the refresh button as shown on top right of the screenshot. Then click on the „->“ arrow to connect.

    Finally, switch to the File Explorer Tab and click on „Open Folder“. At the prompt you enter or select the directory you remembered or copied before and click on „OK“:
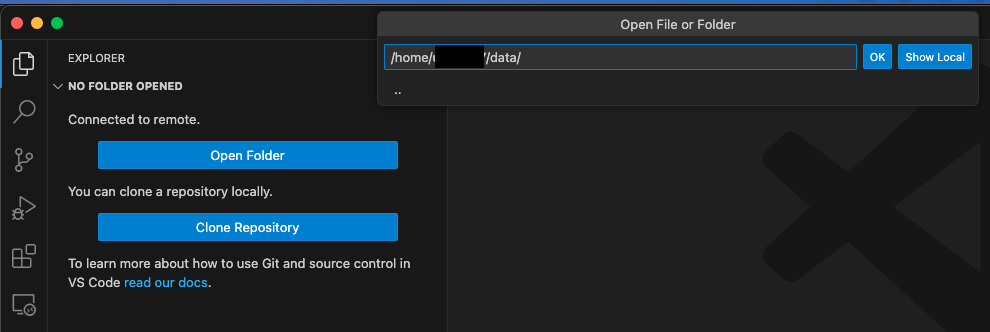
    In case you are asked if you trust the authors of the directory it makes sense to choose yes, since you are the author 🙂

    We are done. You most likely see an empty folder structure since we just created the folder and you can create new files of any kind, like the „README.MD“ on the next screenshot, and folders as you wish.

    It’s also possible to copy files from your PC to the server by drag-and-drop as well as downloading files/folders by a right-click on it at the VS Code File Explorer.

    Result

    Next time you open VS Code the connection will be established automatically. In case you switch between different environments you can always go back to the Remote Explorer tab of VS Code and connect to the server. Be sure to select the folder for connection and not the server itself, otherwise you will be prompted to select a folder at the File Explorer Tab again.
    I hope that short tutorial helped you out a bit 🙂

  • Scientific researches at home with BOINC

    Scientific researches at home with BOINC

    You are a big fan of science? You have a computer or a server? Then feel free to contribute in one or many projects just by donating some of yours PC’s CPU power. The open source tool BOINC will make that very easy for you. Basically you just start the tool, define to which projects you want to contribute and set how much of your PC’s power you want to “donate”.

    Volunteer computing?

    Volunteer computing is a type of distributed computing in which people donate their computers’ unused resources to a research-oriented project. The fundamental idea behind it is that a modern desktop computer is sufficiently powerful to perform billions of operations a second, but for most users only between 10-15% of its capacity is used. Typical uses like basic word processing or web browsing leave the computer mostly idle.

    Source: Wikipedia, 2022-04-02

    Attention

    If you plan to use BOINC or any other tool for volunteer computing you should consider that an extended utilization of your CPU can reduce it’s life span and also can increase it’s eneregy consumption.
    Additionally it’s maybe not the best idea to run BOINC and similar on your cloud computing instanace at MS Azure or AWS, since there, in most cases, you are charged by the consumption of CPU capacity.

    What is BOINC?

    BOINC provides you the chance to contribute to a selection of ca. 30 scientific projects by your CPU’s and/or GPU’s power and includes that into one single User interface. More details about the different projects can be found here: https://boinc.berkeley.edu/projects.php . Additionally the GUI also provides options for configuration and statistics.

    How to start?

    There are two basic ways to run BOINC; Either on your Desktop for example as a screensaver application, or on a server system in 24/7 mode. Personally I prefer the second option, by limiting the proided resources to an amount that does not cause issues of any kind.

    If you like to run BOIN on your PC as a screensaver you can download the tool at: https://boinc.berkeley.edu/download.php .

    In case you prefere to run it on your server system, you can find an example of the content for a docker-compose.yml file here:

    version: "2.1"
    services:
      boinc:
        image: lscr.io/linuxserver/boinc
        hostname: "boinc"
        container_name: boinc
        environment:
          - PUID=1000
          - PGID=1000
          - TZ=Europe/Berlin
          - PASSWORD=xxx
        volumes:
          - ./config:/config
        restart: unless-stopped
        #ports:
        #  - 8080:8080
        logging:
          options:
            max-size: "10m"
            max-file: "3"
        networks:
          - dmz
        deploy:
          resources:
            limits:
              cpus: 1.00
              memory: 2048M
    networks:
      dmz:
        external: true

    The paramaters below resources: are optional, since you could also use the settings dialogue inside the tool to restrict available resources. I just feel more comfortable by doing it that way. The value cpus: 1.00 is equal to 1 CPU-Thread.
    If you do not use an reverse proxy the parameter for ports and it’s value need to be uncommented to be able to connect to the application.
    Consider to set a strong password which then is used at the virtual desktop in your clients browser session. The standard username is abc .

    Conclusion

    After starting and configuration of the tool and selecting one or more projects, nothing exiting will happen anymore here.
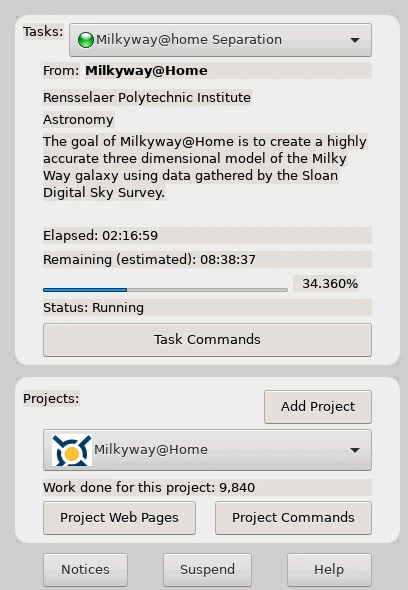
    You can check your current amount of contribution either on the projects website(s) or partly in BOINC itself.
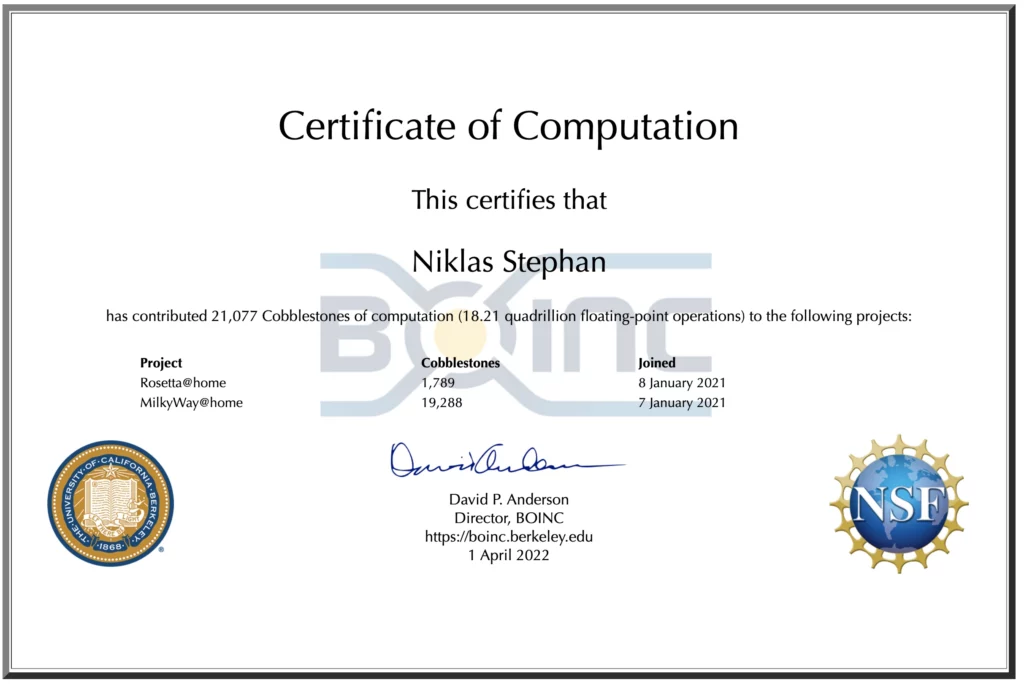
    The generation of the certificate can also be startet at BOINC our your projects website, if you like to do that as well.

    Very straight forward research with BOING, enjoy!

  • Moving MS Teams backgrounds: How?

    Moving MS Teams backgrounds: How?

    Since several years MS Teams and similar are our daily companion, at least if we are working on front of a mac or pc and communicate with people. To spread some indivdual spirit and to show creativity, in most cases some special background image is used.
    But did you ever see one of those guys who has an animated background while using Teams?
    Since the tool doesn’t allow us to use any other than static images, how is that still possible?
    If you would like to do the same or your are just curious, there in general there are two ways to achieve it:

    • Utilization of third party Software like OBS Studio or others.
    • Or, very simple; using a small “cheat” to convience MS Teams to proceed with animated backgrounds 🙂
      This short tutorial shows how you can include and use an animated image, created e.g. via MS PowerPoint, in MS Teams.

    Animated PowerPoint File

    What we actually need is a .gif file, an animated image. There are plenty of ways to generate a gif, but PowerPoint should be the most simple way, since most likely you already know how to use it.
    First step is to create a slide and include the desired animation into it. Once you are done with that, just export the single file as
    .gif, which will preserve the created animation.

    Our cheat

    As an example we asume our exported gif file goes with the name:
    background.gif
    All the magic to do now is to duplicate/copy the file and rename those two files to:
    background.jpg
    background_thumb.jpg
    You are right if you are thinking that operation leads to two invalid files, but as typical Microsoft behavior there is no validation of the files before importing, so MS Teams just accepts them.

    Integration in MS Teams

    We are nearly done. Best thing is you close MS Teams, if open. Now, we have to move both of our files to a specific folder on our hard disk.

    Windows users enter %appdata% in the search bar and then can navigate to following sub-folder:
    %APPDATA%\Microsoft\Teams\Backgrounds\Uploads .
    And that’s where the two files go.

    Mac users start the finder application on top the top bar at “Go To” –> “Go To Folder” and then enter:
    /Users/USER/Library/Application Support/Microsoft/Teams/Backgrounds/Uploads
    “USER” is a variable and has to be replaced by your user name, for sure.

    Now, you can restart Teams and select the new background as any other one. Done!

  • System Password Lost? (Nearly) no problem on Windows!

    System Password Lost? (Nearly) no problem on Windows!

    It could have happend to myself: an old friend contacted me if I maybe could help him out, since he has forgotten his computers user password.
    My first thought was, as usual, you can not be the only one who ever faced this challenge. And, no wonder, yes there are plenty of search results containing hints how to reset a lost Windows 10 password.

    But then, after trying some of the tutorials I figured out that many of the hints have been already identified as security issues by Microsoft and just have been fixed. Others basically just did not work at all. So what’s next?

    Time to get the hands dirty 🙂 This posts describes how you can reset the admin password in the most current (2022-01-06) version of Windows 10.

    Only thing required: Internet access from another pc and physical access to the affected computer.

    Perparation

    My friend just brought the affected pc to me, so I could take my time to work on the issue. Bad and good news was: The locked account was a local account, which means he could not utilize Microsoft’s standard procedure for password reset but opened the gate for the dirty tricks described within the article.

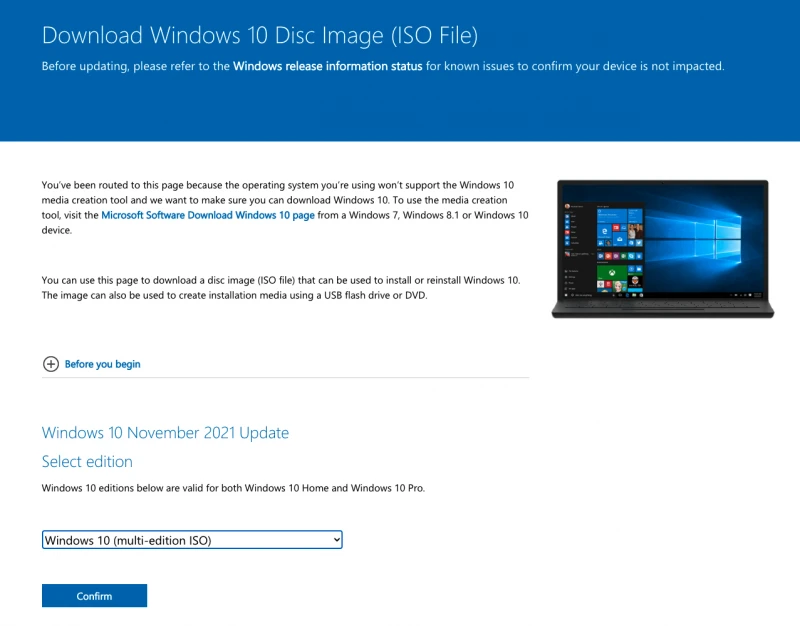
    In advance I already created a Win 10 installation media on an USB-stick, since most tutorials recommended to do so.
    The official source for download at Microsoft is linked at the end of the article, and totally legal to use.
    There are plenty of desriptions how to setup a USB-stick for Windows installation on the net, so I will not desribe that here.

    Procedure

    Following procedure helped me to reset the password, it can slightly differ for you, depending on your environment.

    1. First thing is to boot the affected pc from the newly created installation media.

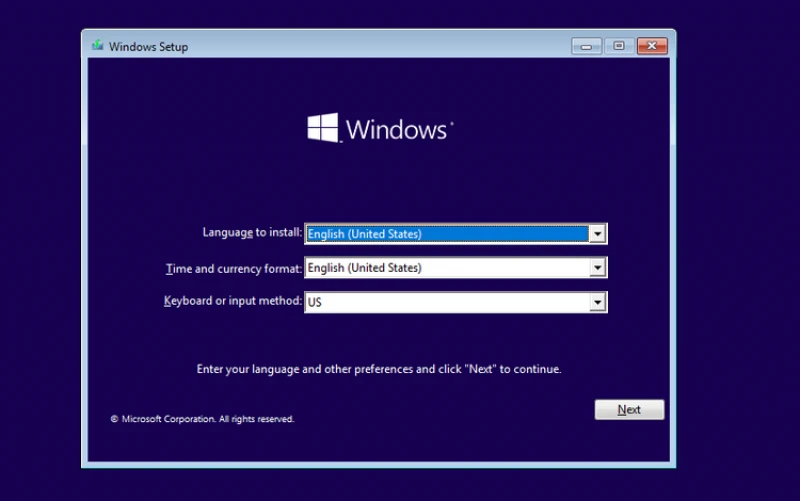
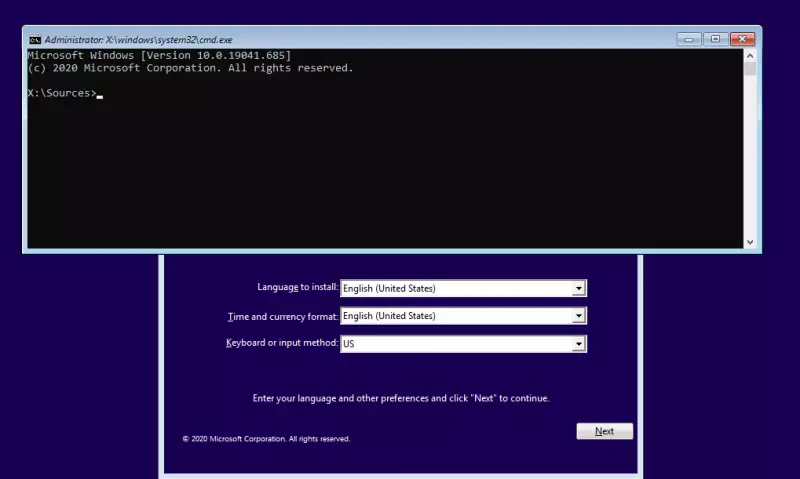
    2. When arrived at the dialogue for choosing the language, instead of doing so we press SHIFT+F10 keys simultaneously.

    3. Now, a command line appears (weird that it does). The we change to our system drive, e.g. by entering C:.
    4. Here we have to navigate to our system directory, in most cases by cd WindowsENTER and then cd system32ENTER.
    5. Some more DOS commands follow: cp utilman.exe utilman_old.exe creates a backup to be able to reverse our small “hack” later on.
    6. copy cmd.exe utilman.exe overwrites the utilman executable we backed up before with a copy of the command line tool.
    7. Basically that waas the part we can call a small “hack”, we will rely on in the next steps. The PC has to be rebooted without the instalalation media, now.
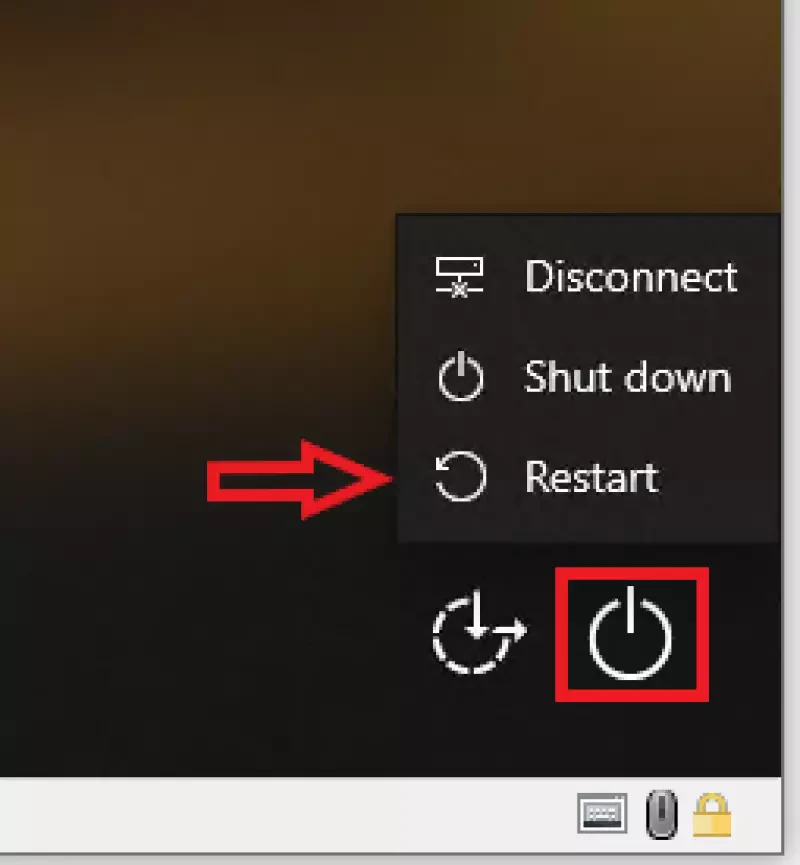
    8. At least in the latest versions of Win 10 (or better of the windows defender tool) Microsoft blocks any direct call to the command line, so we have to reboot again in safe mod to bypass this, too. If you don’t use defender, you maybe can ignore this step. To reboot in safe mode: keep the SHIFT key pressed and click on bottom right power icon and select “reboot”.

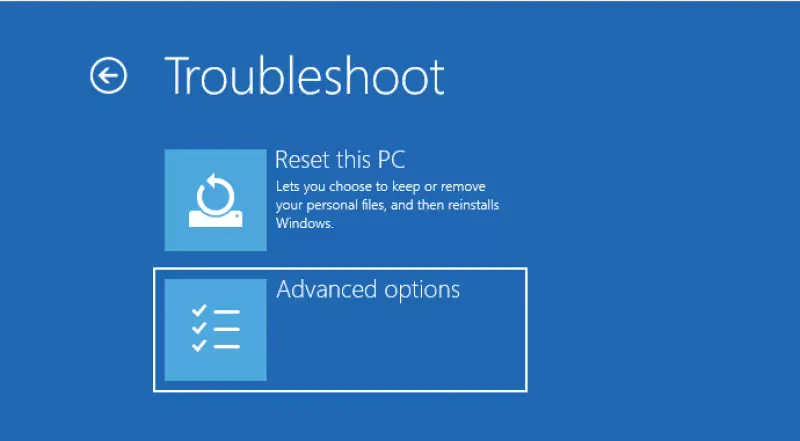
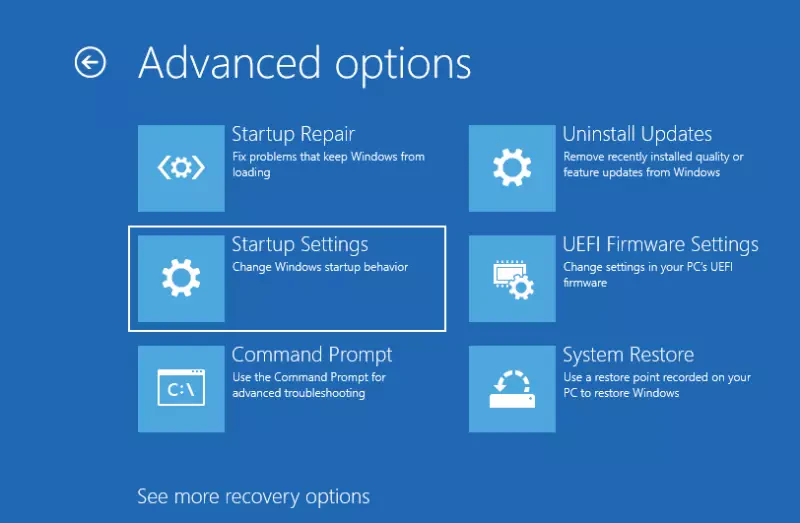
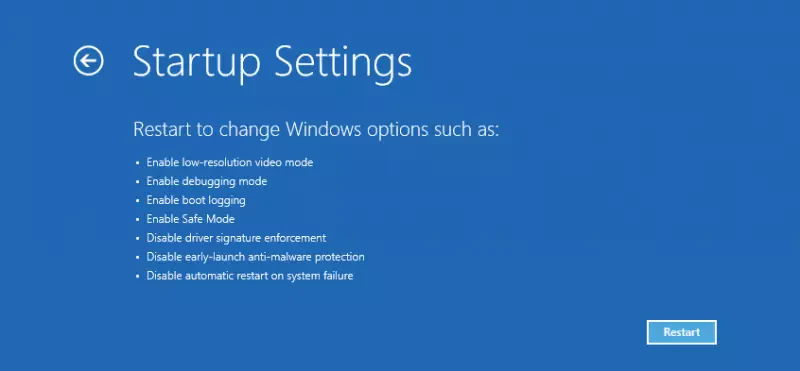
    9. After some seconds a selection screen appears, where you can choose “Advanced Options” and then “Startup Settings”. Now you finally can click “Restart”.

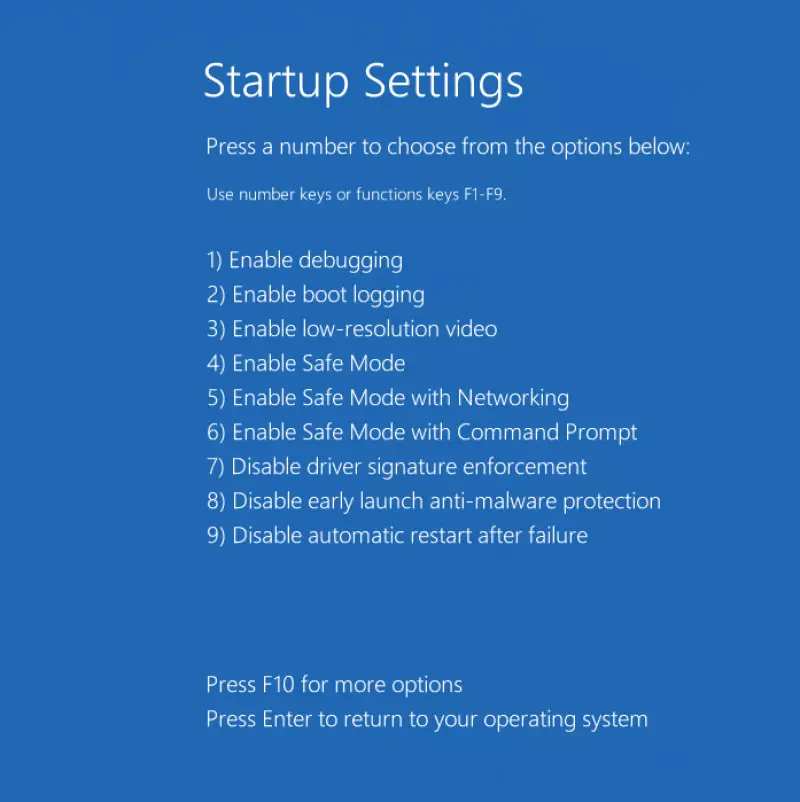
    10. Once the machine is up again, press key 6 to continue boot in safe mode.

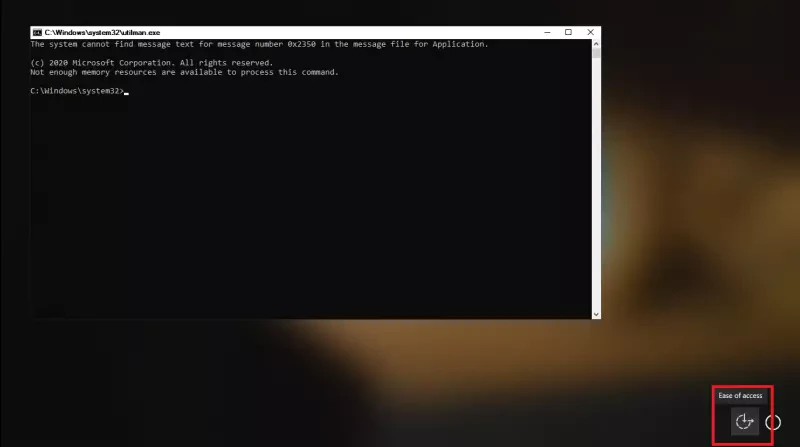
    1. Don’t worry that you are prompted to key in your password again. Let the magic start and click on the “Ease of Access” button (the second icon bottom right). Instead of the “Ease of Access” tool, the command line will open and you have full administrative permissions on your pc, WITHOUT knowing the password.


    1. To reset the locked password a few more commands have to follow, now: net user will show us all currently existing user accounts on the pc. In my case the account I wanted to reset, was not shown here. Maybe a gap of knowledge on my own, but anyhow I saw the “Administrator” user. So I changed my plan slightly and reactivated that account (it’s deactivated in a default installation), to use it login to Windows and the reset my targets user password via the graphical interface of Windows. To reactivate the “Administrator” account, see the next step.

    2. Command net user Administrator /active:yes will do the reactivation for us. Another net user Administrator PASSWORD sets the password to “PASSWORD”. If you have issues to find your original user and also not able to reactivate the Administrator account, the net user … commands also would allow you to create a new user.

    3. Time for another reboot.
    4. This time at the login screen we see at least more than one user to select from on the bottom left side. For sure we choose the “Administrator” user, since we know that password for that one from two steps before.
    5. Some steps later in the Win guy we will see a mostly clean desktop and are logged in successfully.
    6. We open the Control Panel and navigate to -> Users –> Other Accounts where we are finally able to reset the password of our locked user.
    7. We are done! Time for a last reboot. But this time we can do a login with our normal user again 🙂

    Cleanup

    Maybe best to cleanup the mess we created before. We open the command line and execute the following:

    • net user administrator /active:no – to deactive the “Administrator” user.
    • C: , cd Windows , cd system32 , del utilman.exe , copy utilman_old.exe utilman.exe – to restore the utilman executable to it’s original state.

    Conclusion

    To avoid to have issues about forgotten win passworrds at all there are plenty of options. One would be to use the Microsoft Online Accounts instead of a local user. It seems Microsoft more and more forces the users of windows to do so anyway, if they like it or not. At least reseting a forgotten password should be easier that way, as long as you have an internet connection…

    Anyhow, that the described procedure is actually a security risk, not a feature. If you followed the guied, you most likely already recognized that it can be executed on any pc with physical access.
    Other operating system, at least the unix based ones like Linux and MacOS, wouldn’t allow similar.

    But, at least I was able to help my friend 🙂

    Appendix: How can I block such an attack to protect myself and my data?

    Just using the Microsoft Online accounts instead of a local one is not a real fix, since the described procedure also allows us to create new local accounts with administrative permisssions.

    In addition you would have to:

    • Set a password at the computers BIOS/UEFI which is requested first thing on your pc’s boot before allowing any other action.
    • Additionally you would have to enable encyrption of your hard disc, e.g. my Micorsoft Bitlocker to avoid attackers from just removing the hard disk and attaching it to a different pc without BIOS/UEFI password.
      Both actions make the user experience slower and less comfortable, so I assume not many people will do so.

    Another thing could be done by Microsoft themselves:

    • if they block access to the command line during windows installation. still not secure, since we just could boot e.g. from a WinPE disc.
    • if they would check the signatures of system related files like the command line or utilman to block dirty “hacks” like described in this article. Other operating systems provide similar functionalities, no idea why Micosoft does not.

    Sources